General Description
Wizmi is an investigational, non-invasive, wrist-worn optical glucose monitoring system used within the Wear2b‑07 feasibility study. The system continuously measures, records, and analyzes glucose information in enrolled adults according to the study protocol, using a wearable sensor, charger, mobile application, and secure cloud.
Customer Support
Contact your study site or the support number provided during training.
If a problem persists after the checks above, contact:
Study support phone number: +1 (332) 254 8989
Study support email address: support@wear-2b.com
Wear of the device
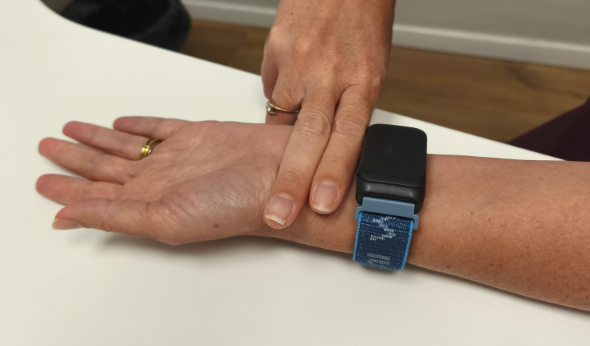
The user wears the Wizmi sensor on the inside of the non-dominant hand's wrist (opposite from where a regular wristwatch is worn), as can be seen in the image below.
The sensing surface is in the middle of the inner wrist, and the strap is snug enough to keep the device in place without being too tight or cutting off circulation.
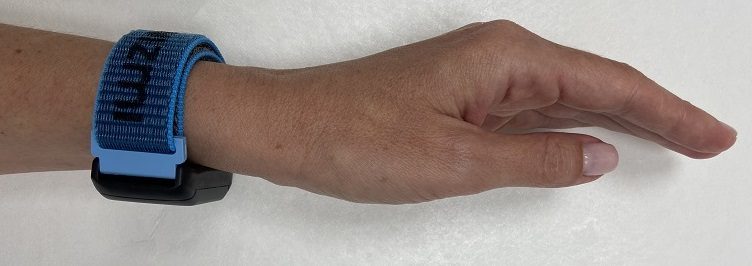
Place the device on the inside of your wrist (the inner palm‑side of the wrist), 2 fingers distanced from the wrist joint:
Before first use, make sure the device is fully charged and that the approved Wizmi™ mobile application is installed on a compatible smartphone.
Charge the device only with the approved charger and cable supplied or approved for the study configuration. Connect the charger as instructed and allow the device to reach full charge (green light) before first use.
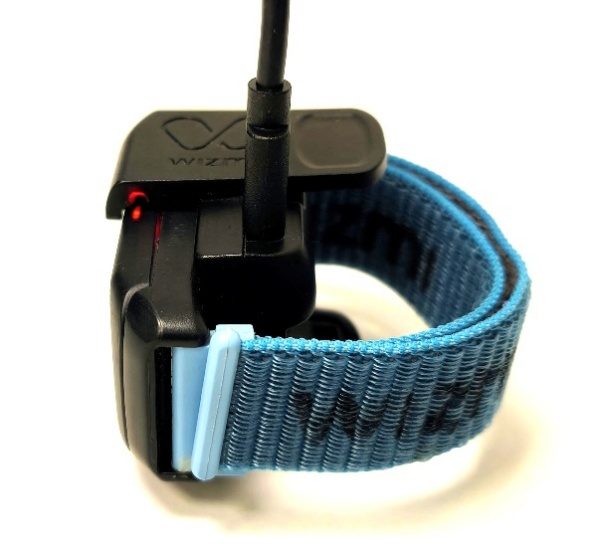
The figure above shows the Wizmi device correctly positioned on its charger and the connection of the supplied USB‑C power supply cable. The device should be placed in the charger as shown and kept connected according to the instructions provided.
Protect your skin and device
Wizmi™ is not water-resistant. Remove it before showering, bathing, swimming, or entering a sauna or steam room. Do not rinse or immerse the device or charger. Gently dry sweat or moisture with a soft, dry cloth. Clean the exterior and strap only with soft, dry cloth.
If your skin becomes irritated or damaged, remove Wizmi and contact the study team. If the device or charger is damaged, very hot, swollen, or has an unusual smell, stop using it, place it on a non-flammable surface, and contact the study team immediately. Do not operate or charge damaged equipment.
Do not open, repair, or modify the device, charger, or app. Avoid high heat, strong impacts, and strong electromagnetic sources such as MRI systems; follow site instructions. Return the device, charger, and accessories when you finish or withdraw from the study.
Before first wear:
Connect your Wizmi™ device to the supplied charger.
Initially a red light would appear indicating good charge.
Wait for it to change to aa green light indicating full charge.
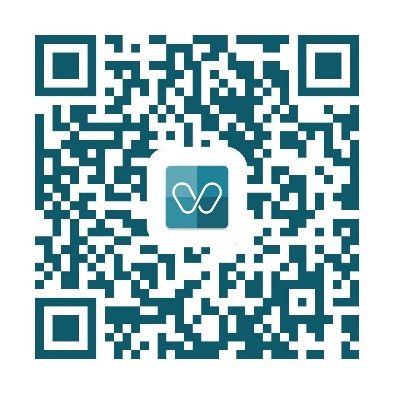
Download the Wizmi application using the installation link or QR code provided by the study team (iOS)
or
from Google Play (Android).
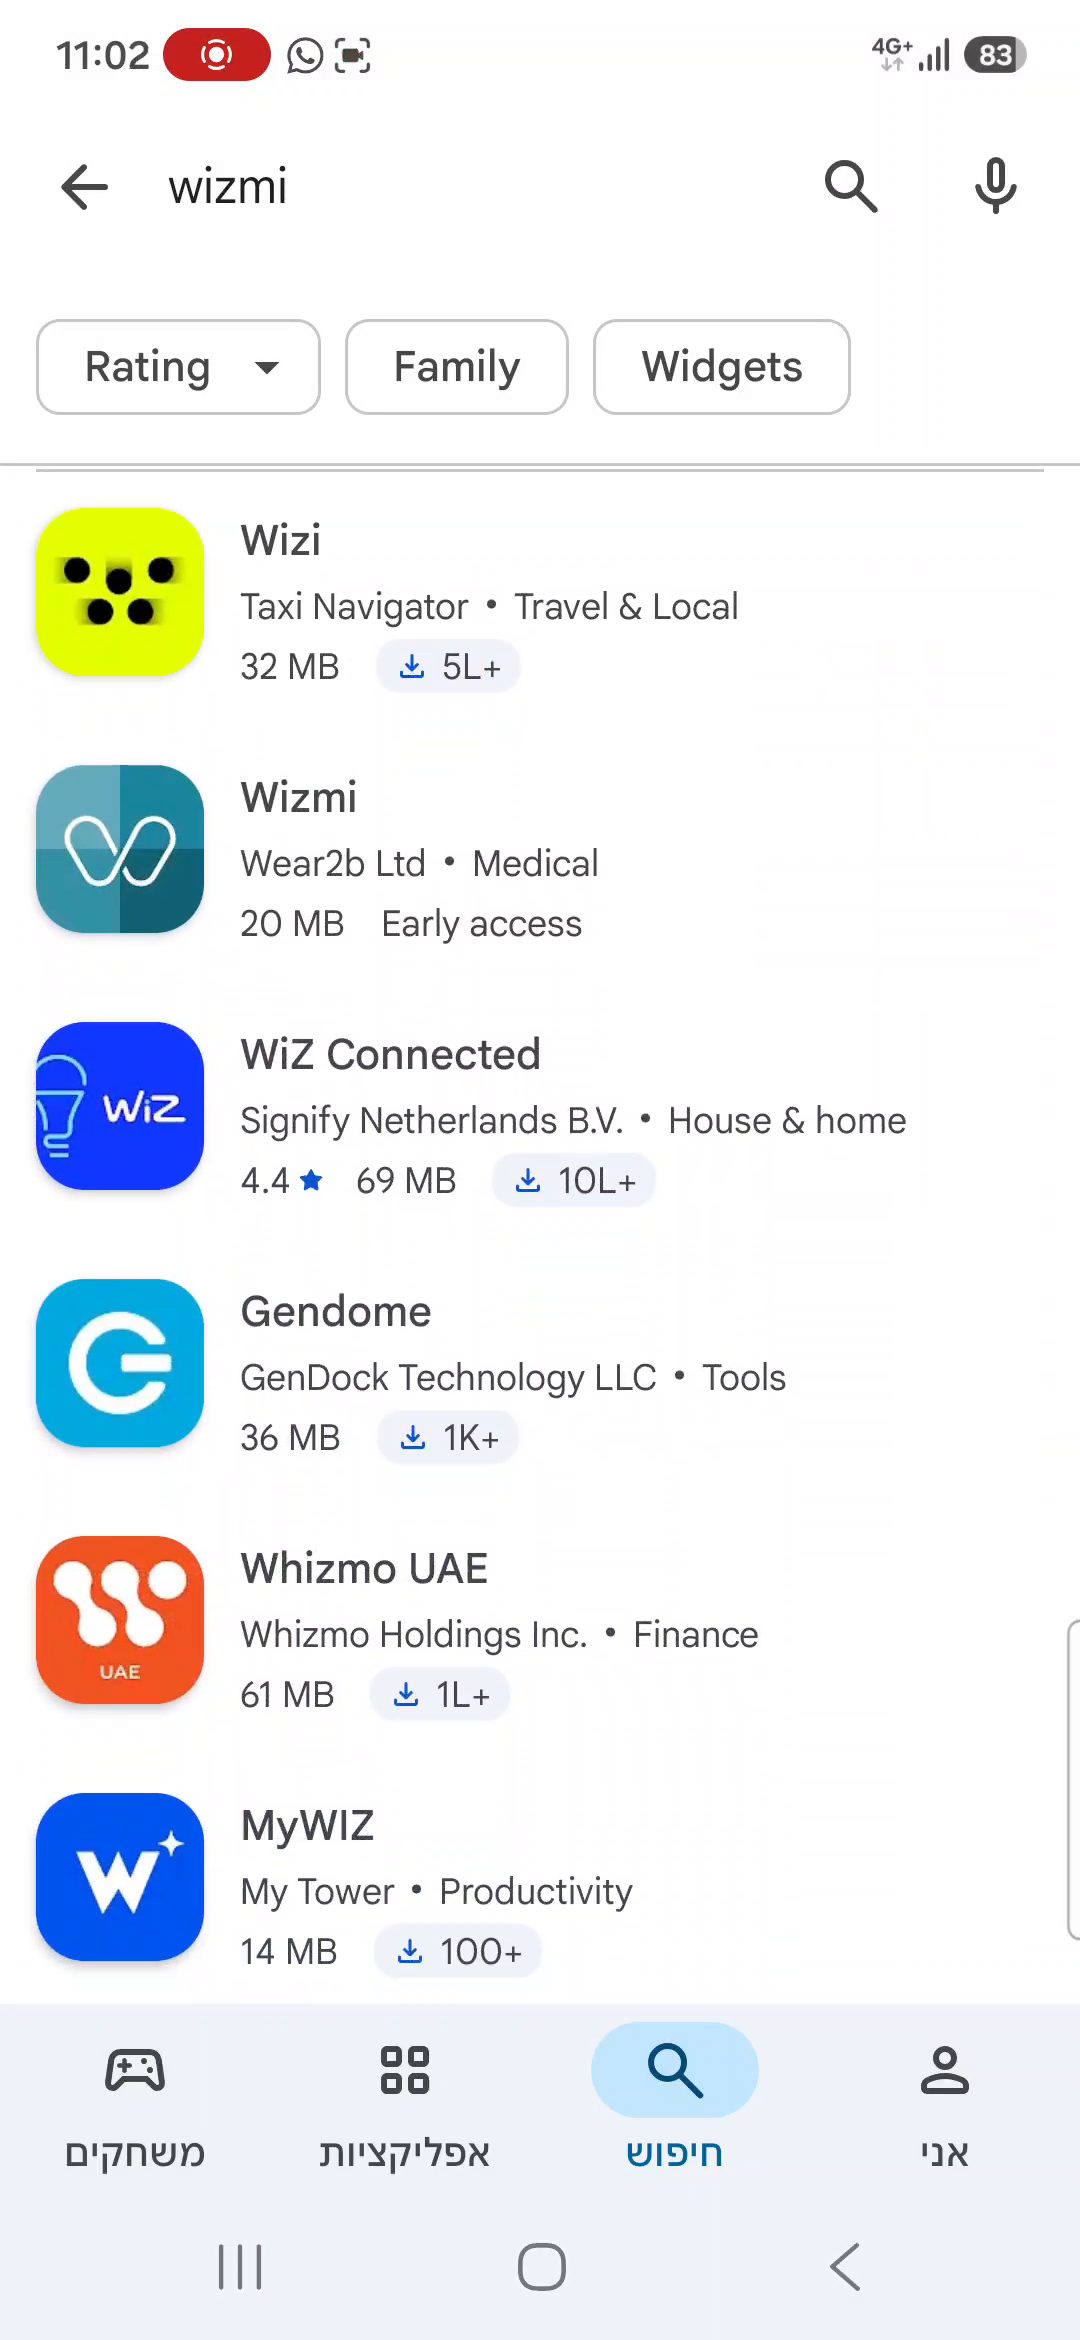
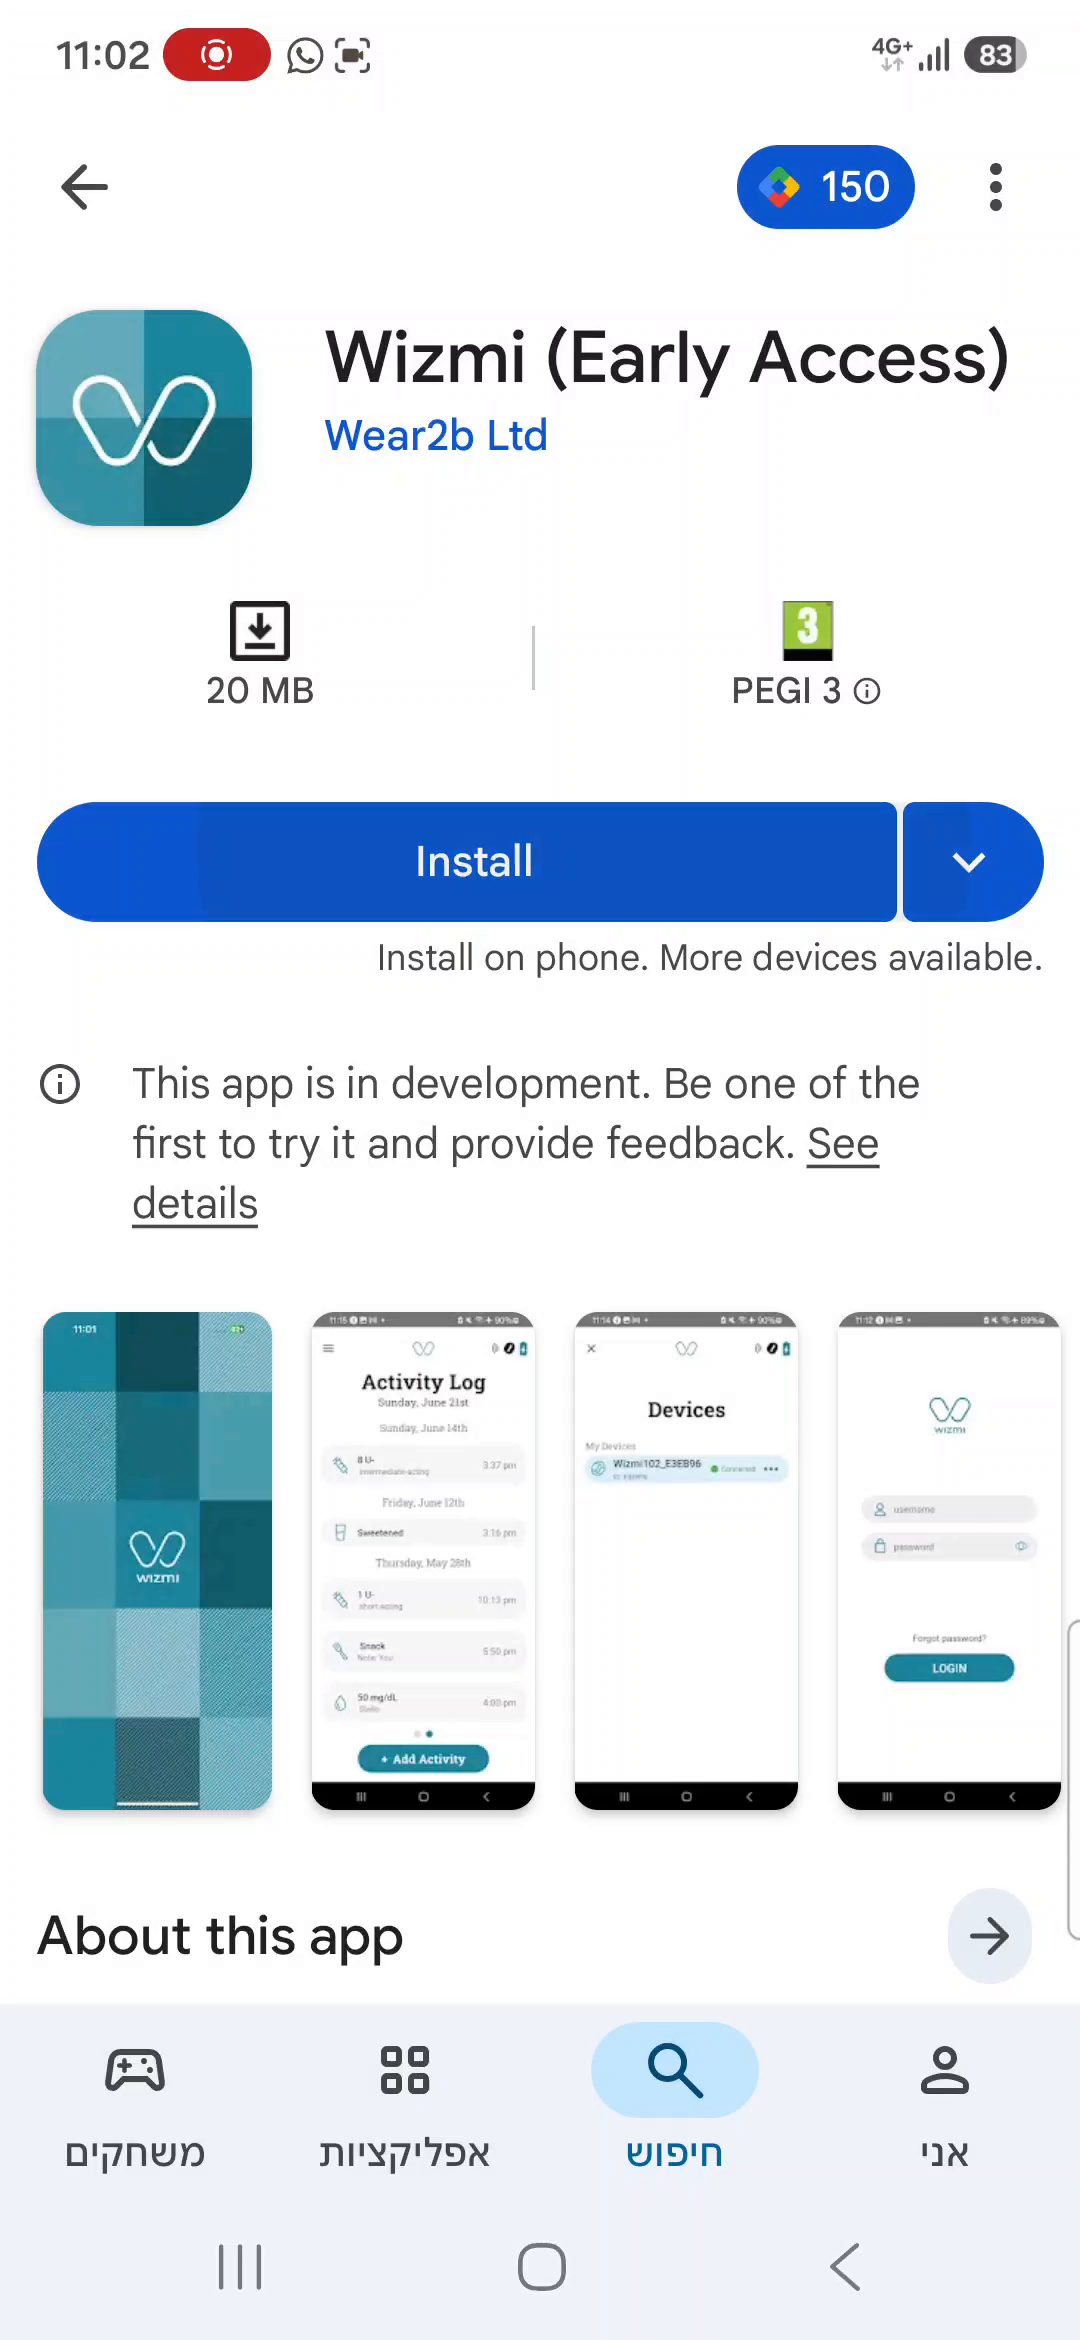
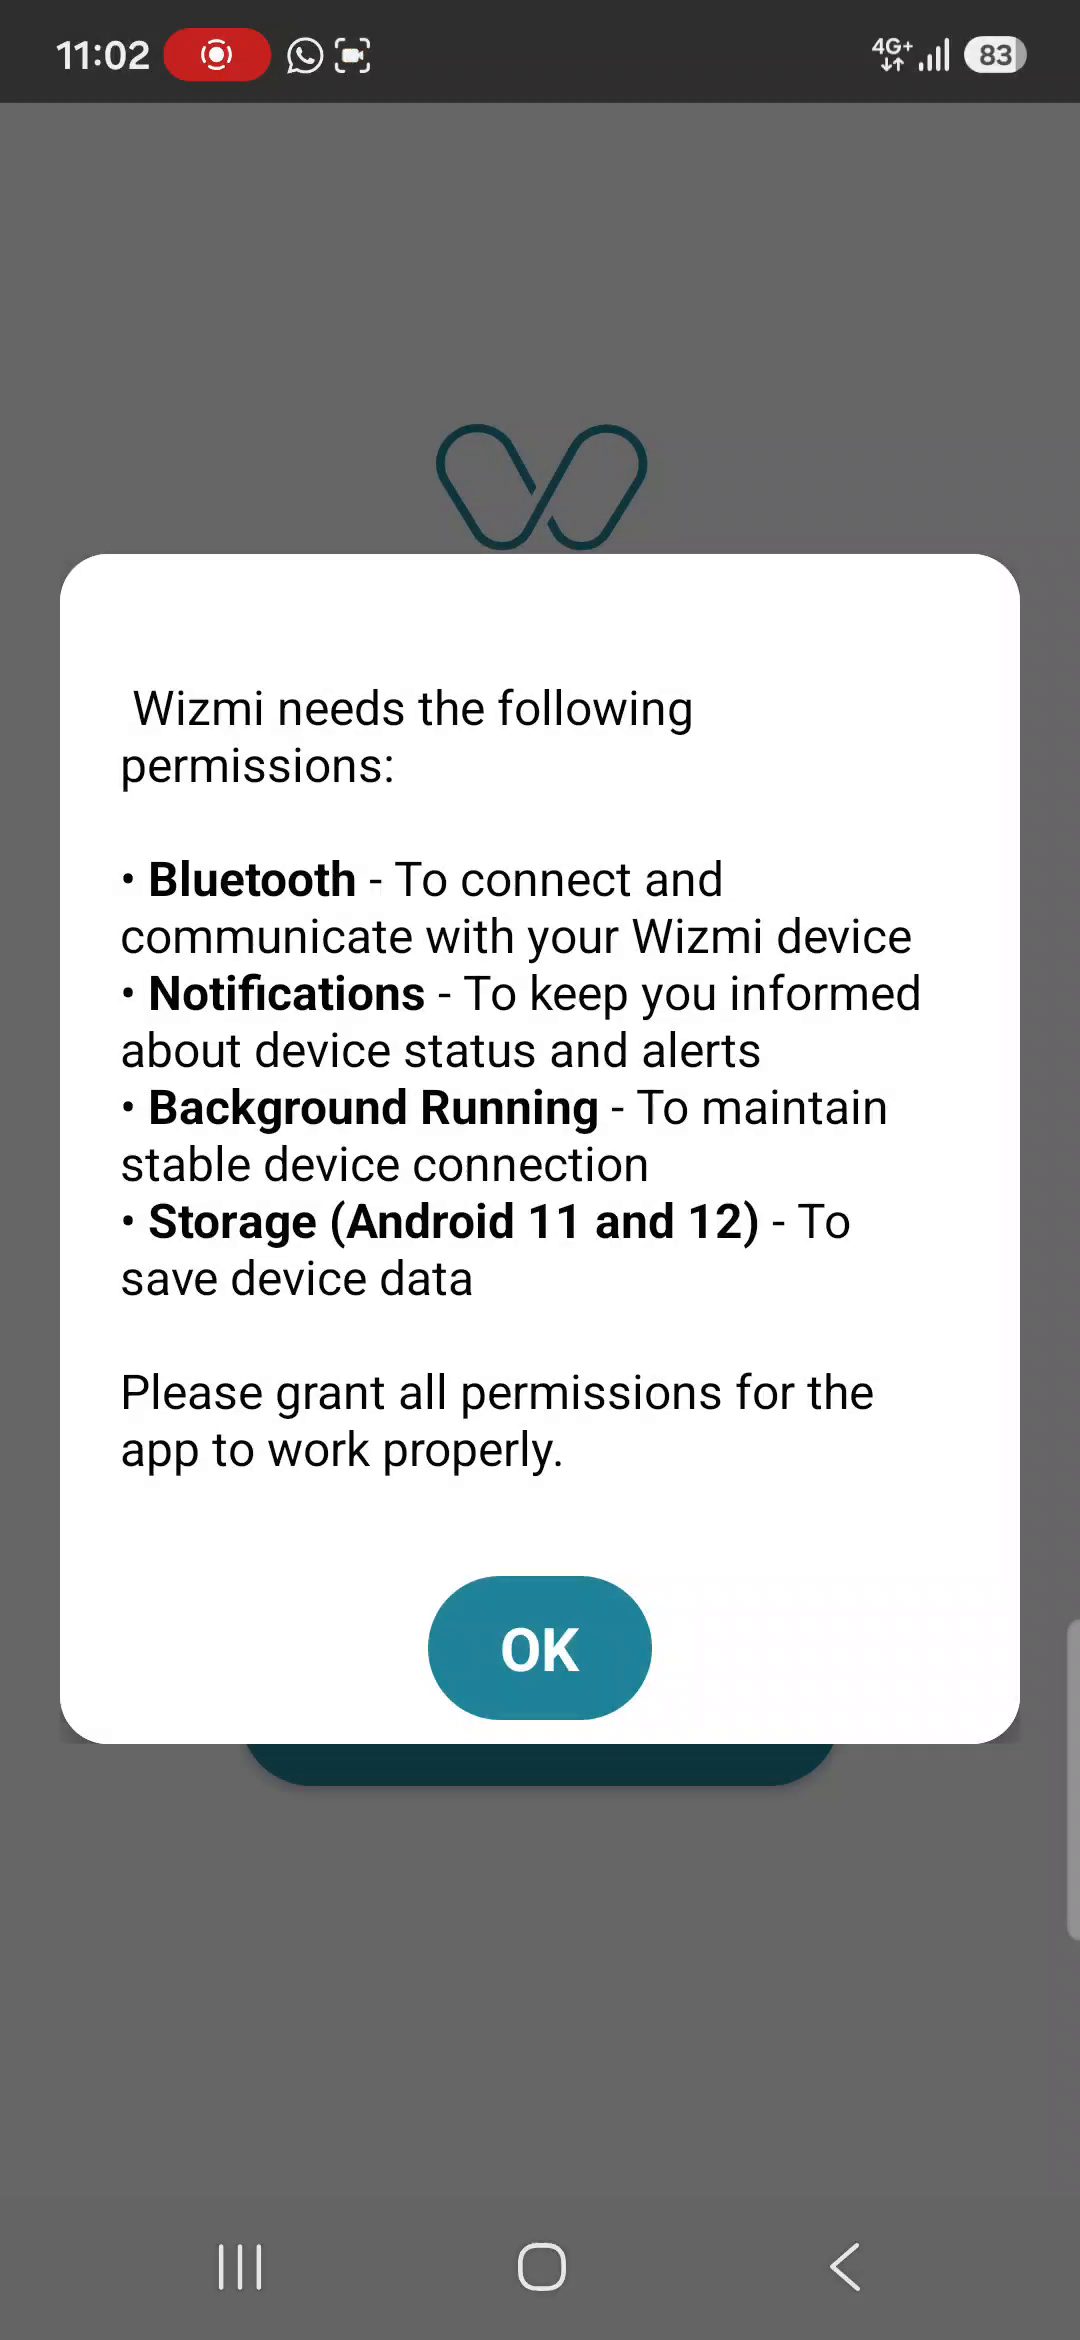
After the installation is complete, the Permissions screen will appear. Allow all requested permissions to ensure the app functions properly.
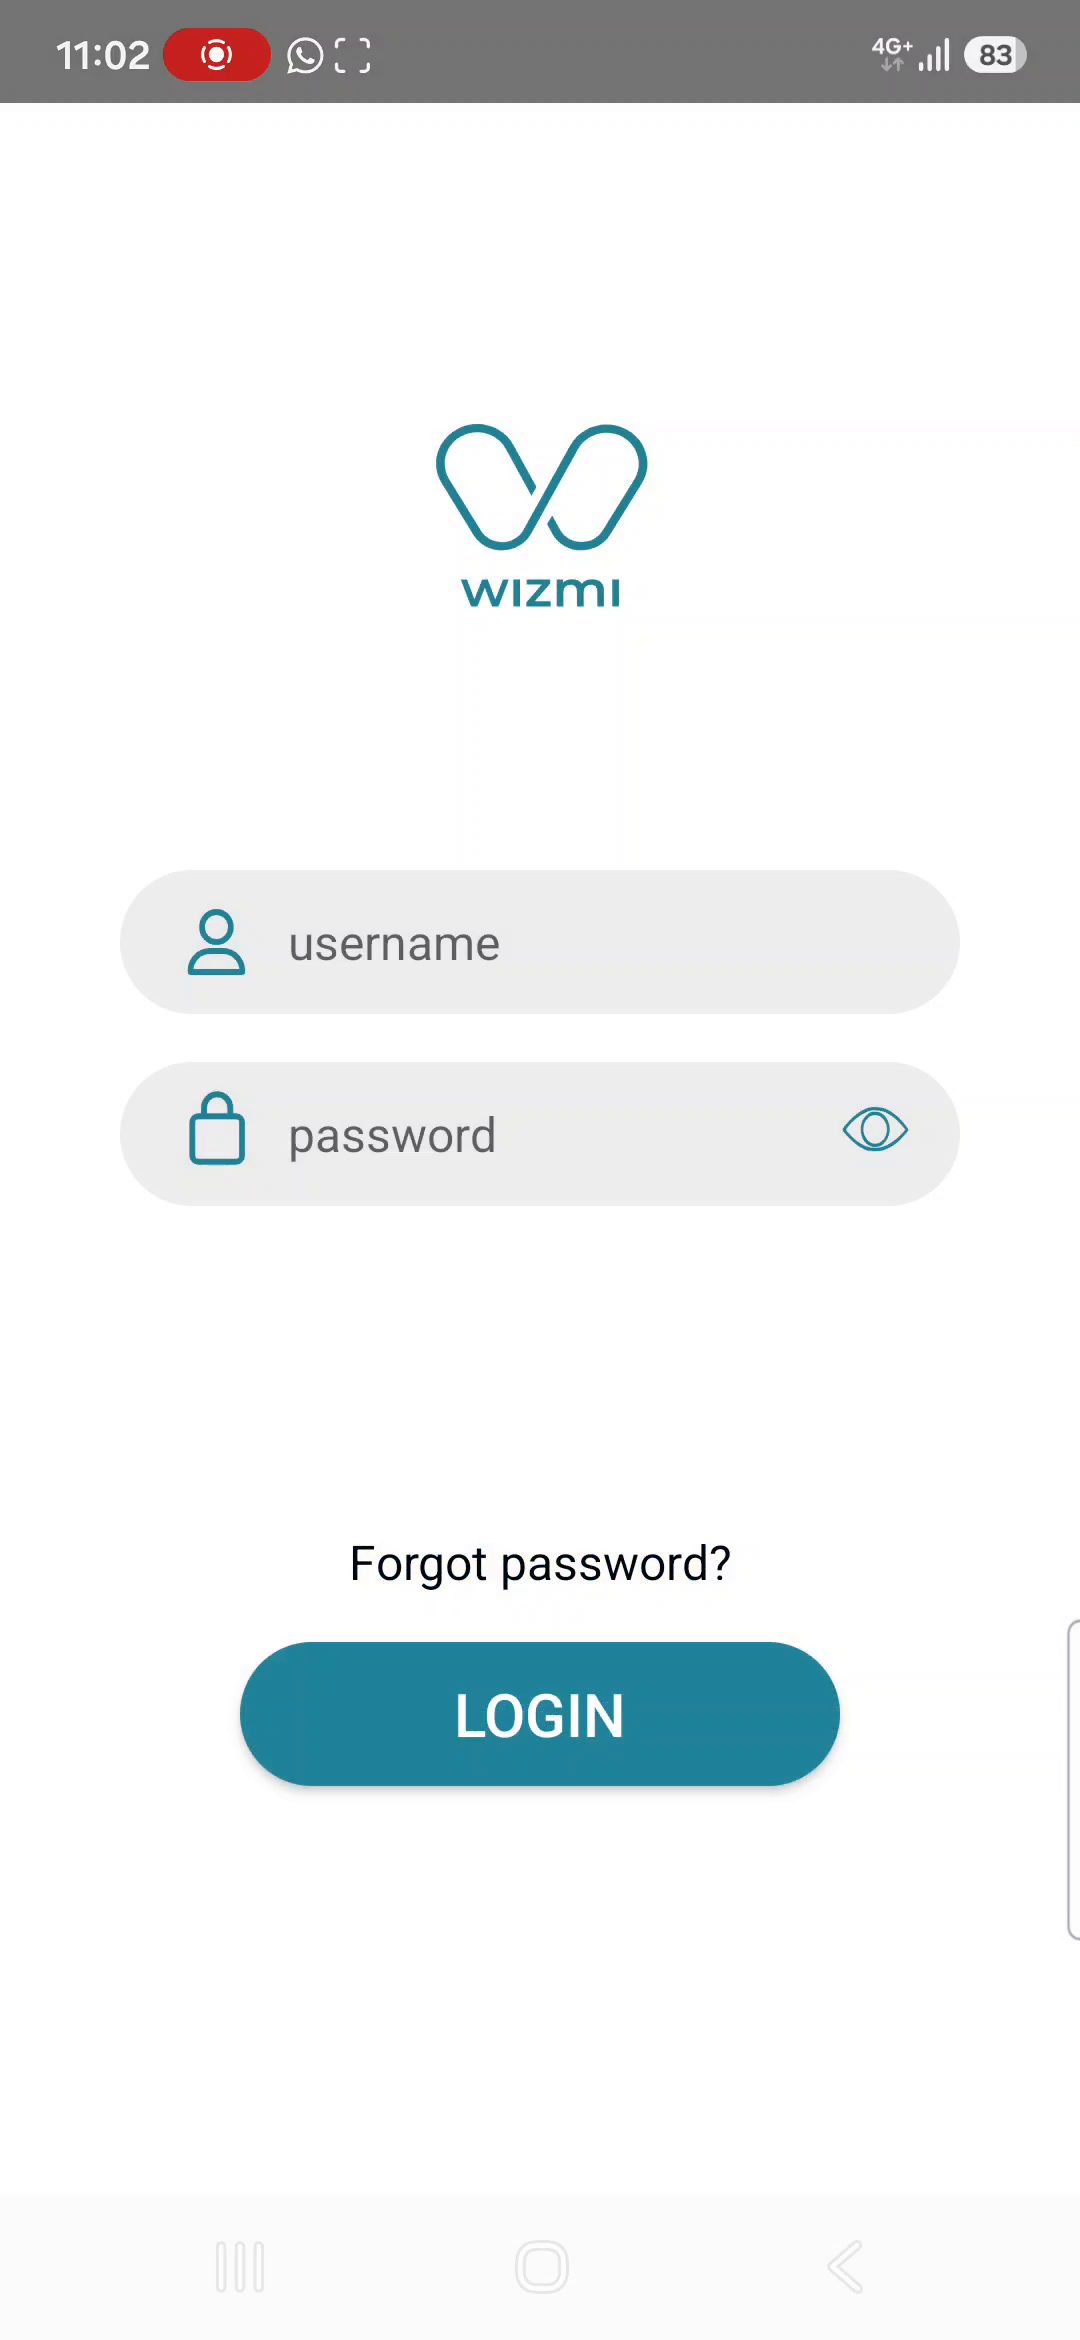
Login to the Wizmi™ application with the username and password that were provided to you by the site staff.
After successful login, a list of available Wizmi™ devices would be displayed in the devices screen of the App.
Click on the device name that was given to you by the site staff (if needed use the MAC address of your device that is indicated inside your Wizmi™ box).
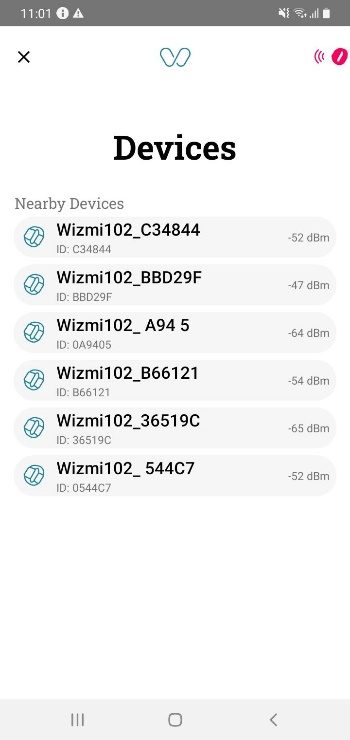
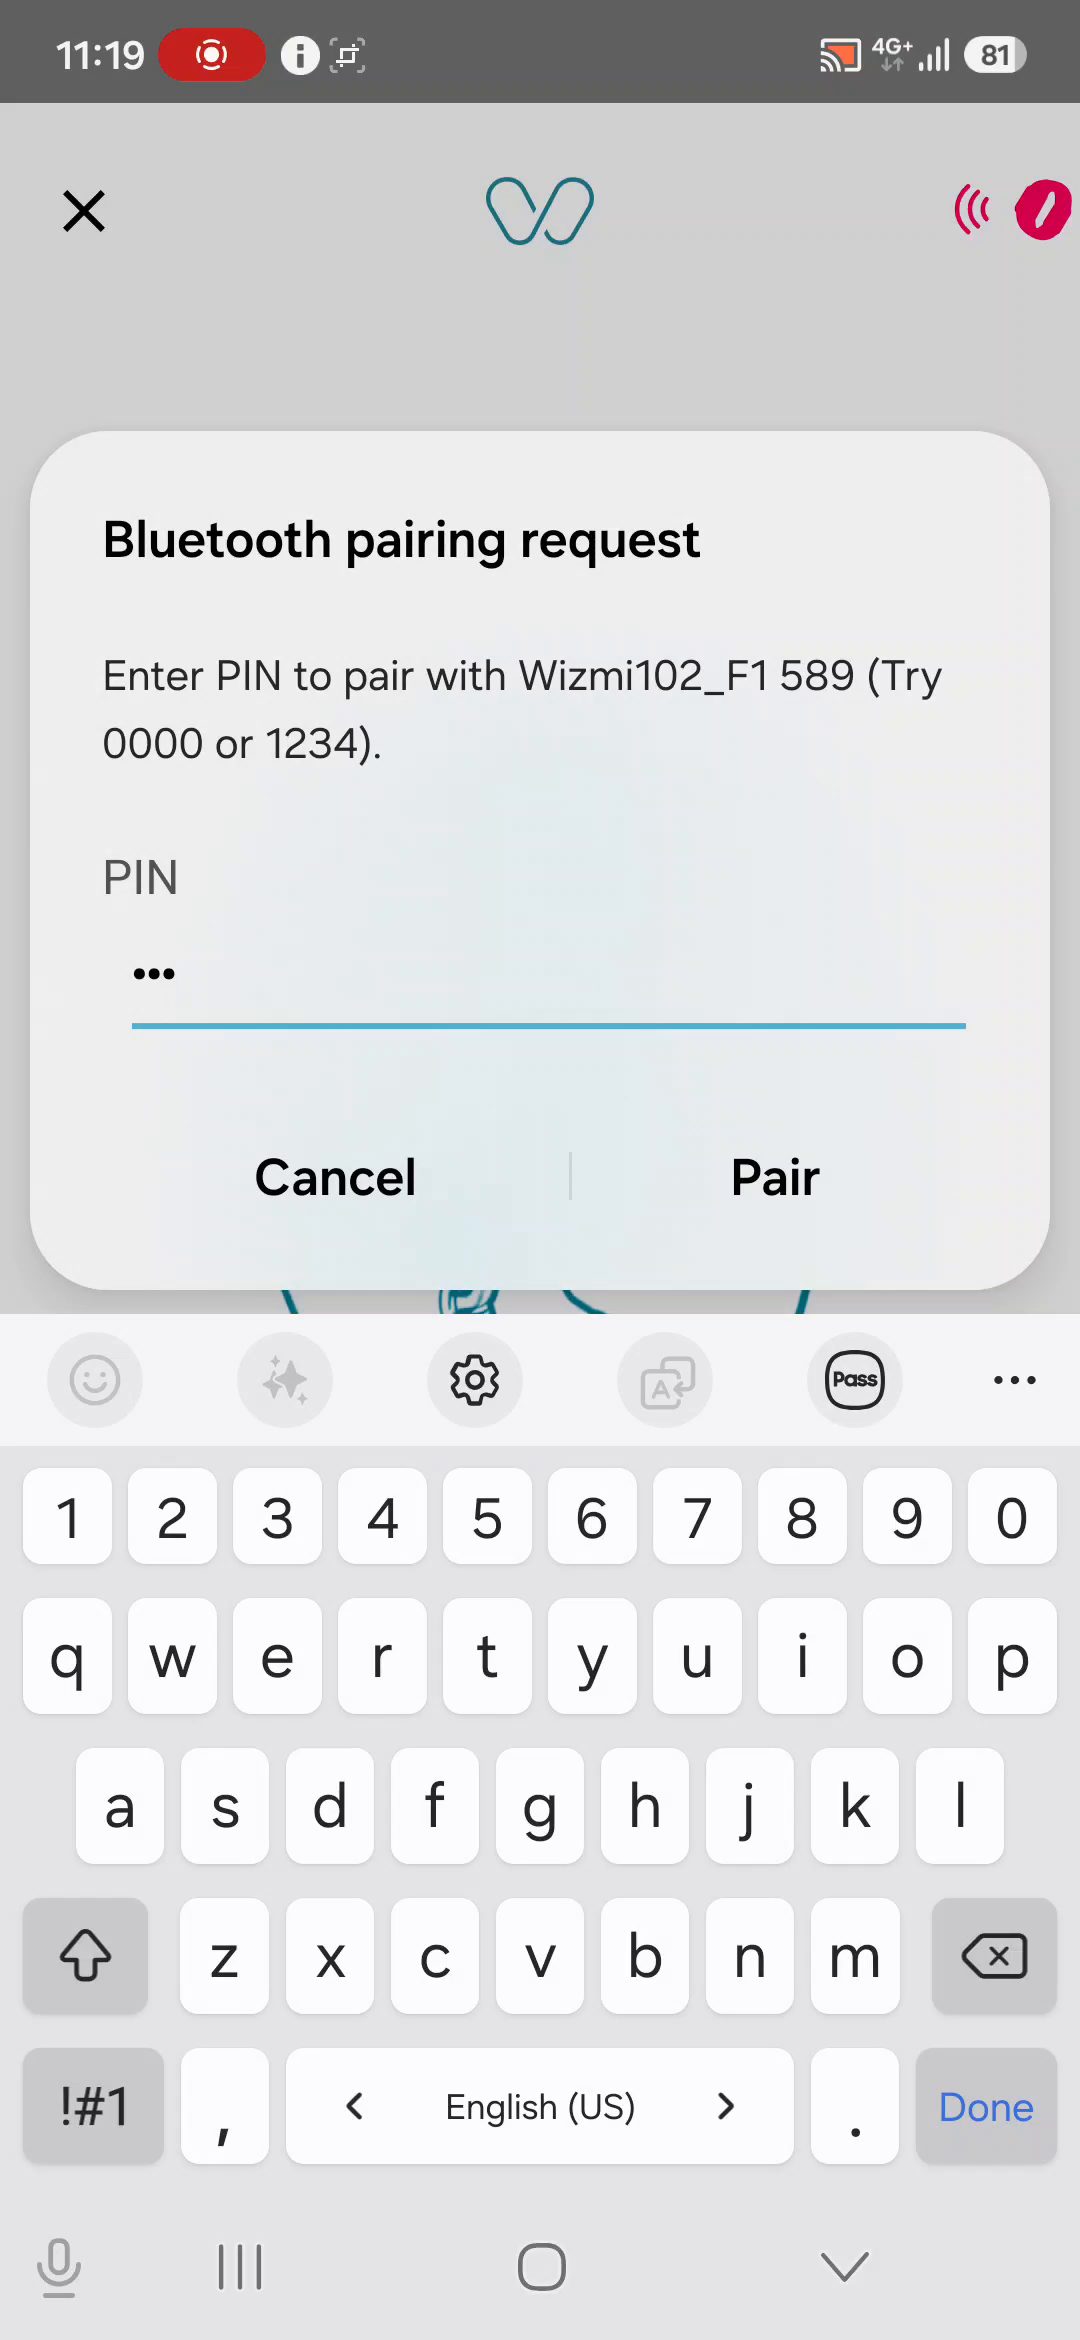
A pop up with pairing request should appear on your screen.
Pair the Wizmi device with the smartphone using the unique pairing code indicated inside your Wizmi™ box.
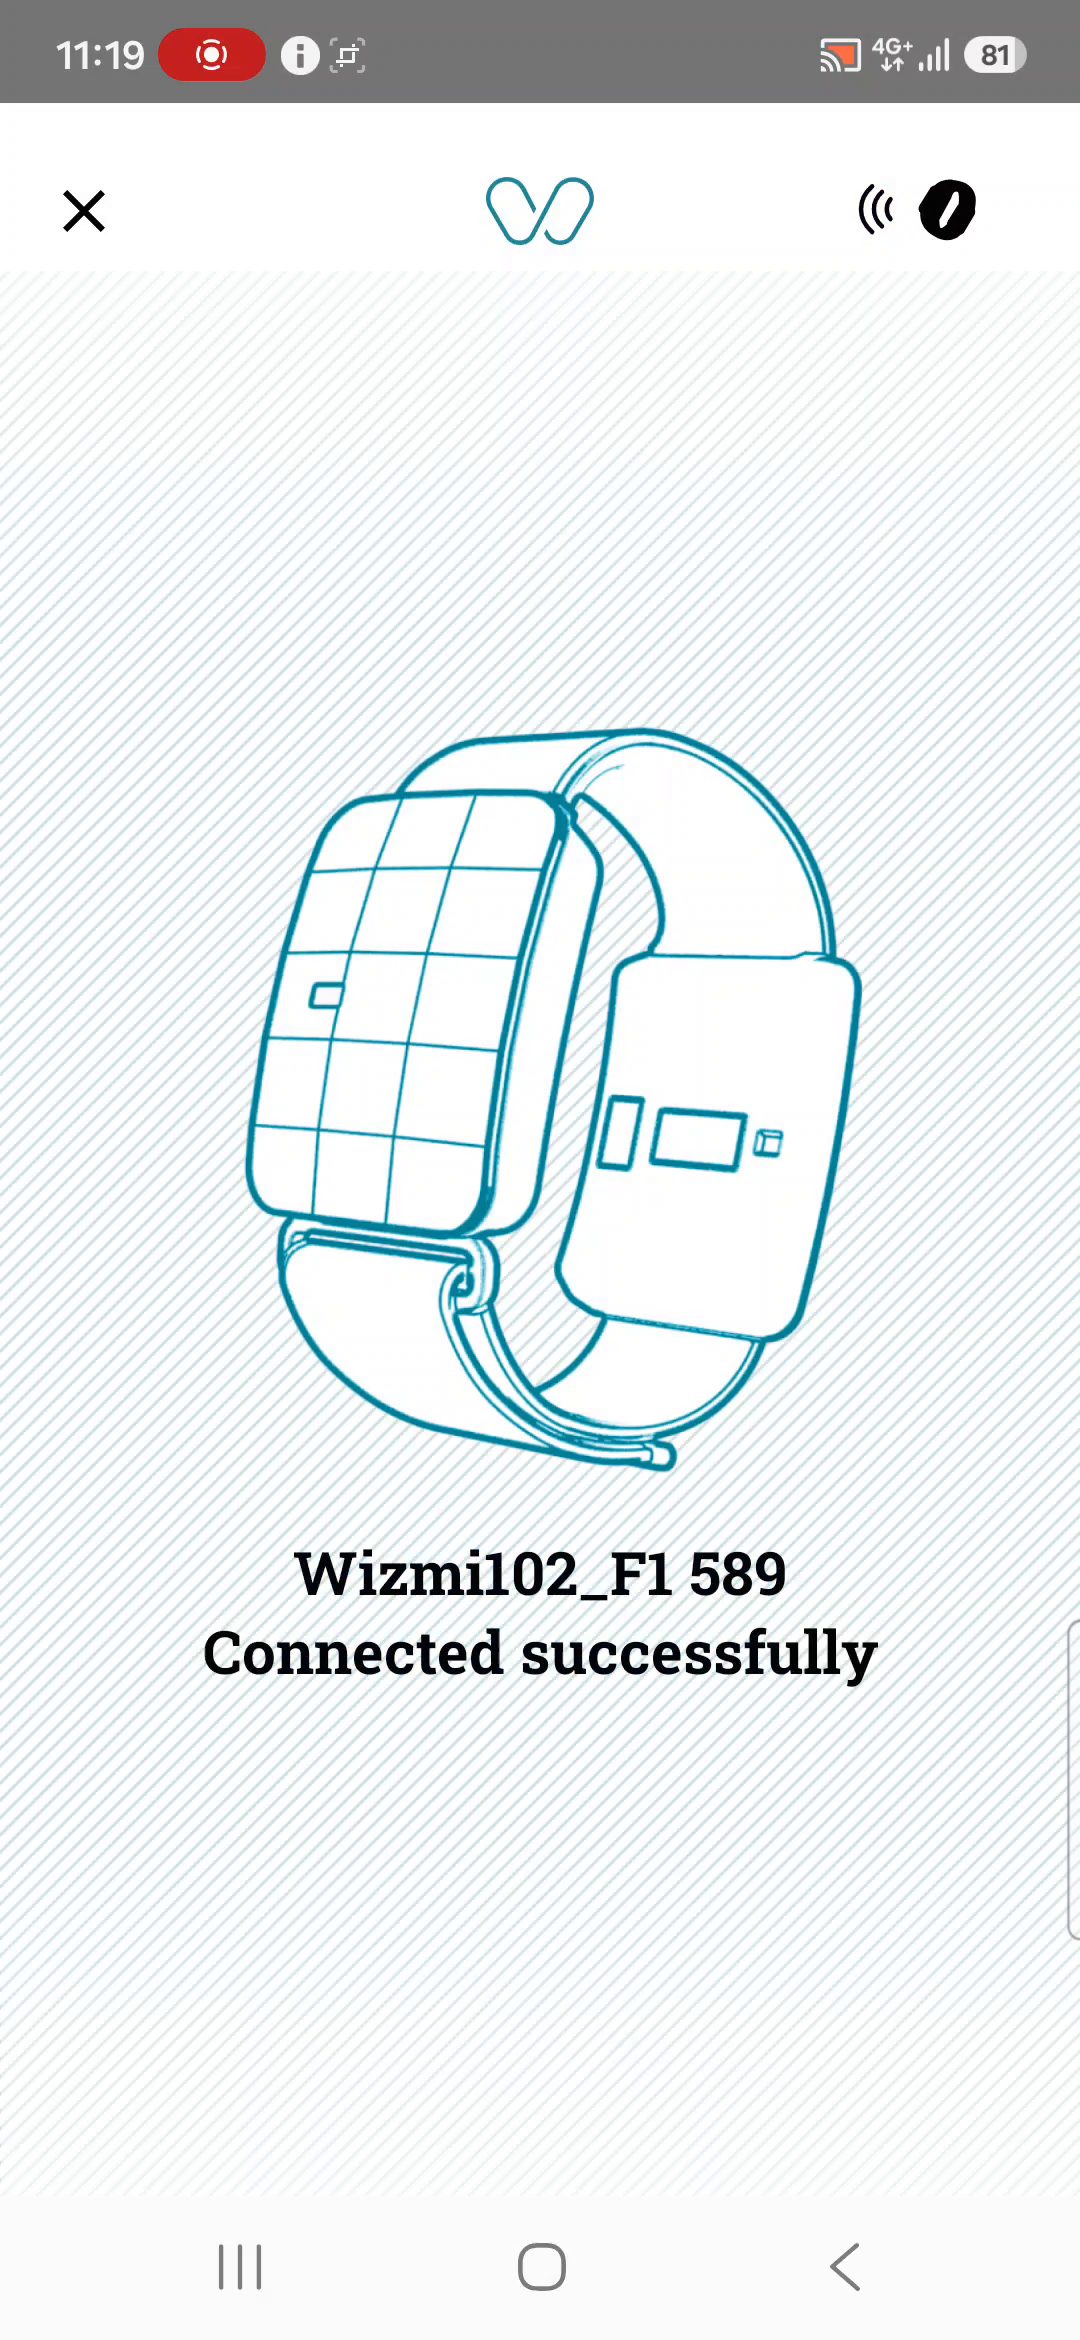
After a successful pairing, the following screen should appear in the app:
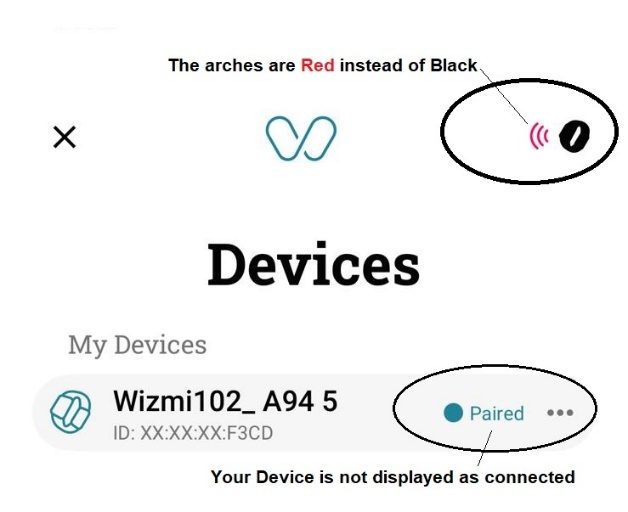
Verify that pairing was completed successfully by confirming that both communication indicators located upper-right corner of the screen, changes from red to black as shown in the picture to the right.
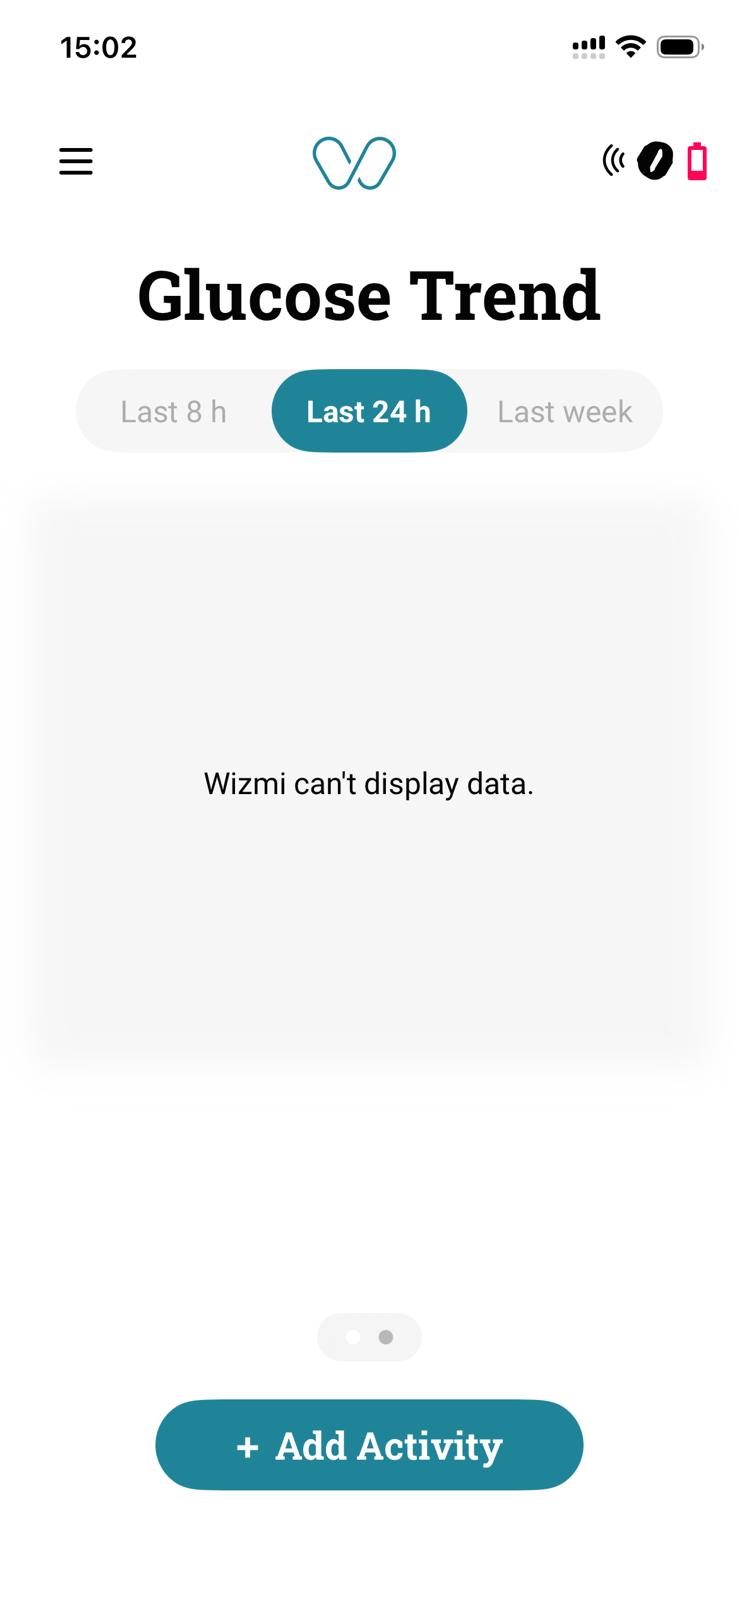
Once the installation is complete, the main screen of the Wizmi application will be displayed. During the clinical study, the glucose display on the main screen will appear blurred, as glucose results are not available to study participants.
To access additional features, tap the Menu icon (☰) located in the upper-left corner of the screen.
The following menu would be opened, enabling you to navigate the different screens of the App.
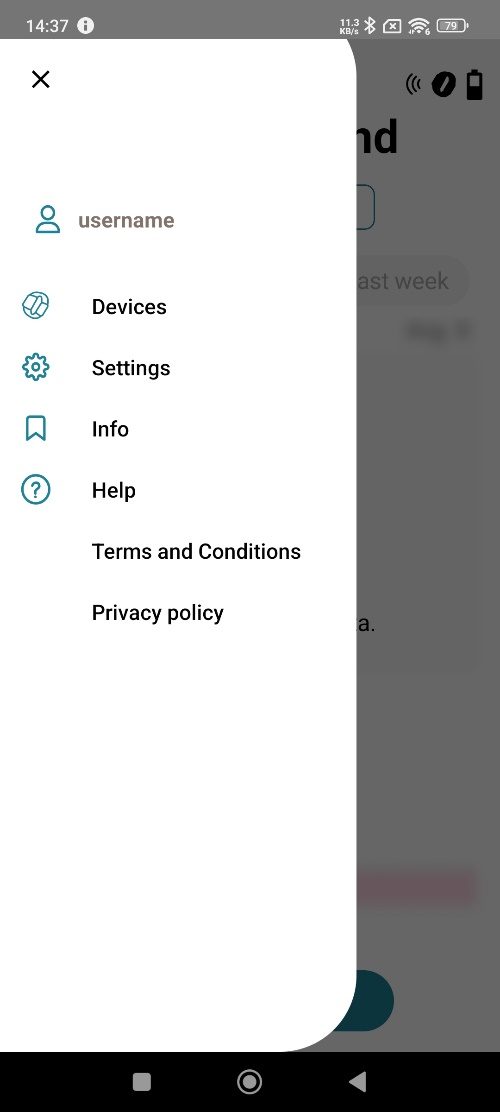
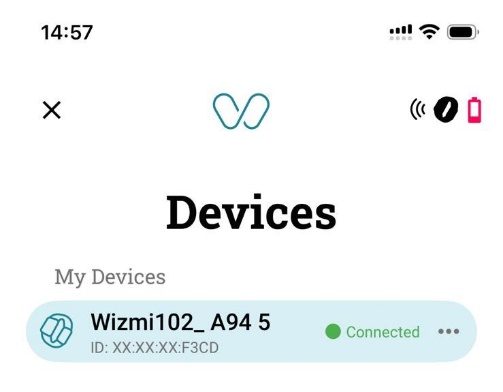
Select the Devices option and confirm that your device is shown as Connected.
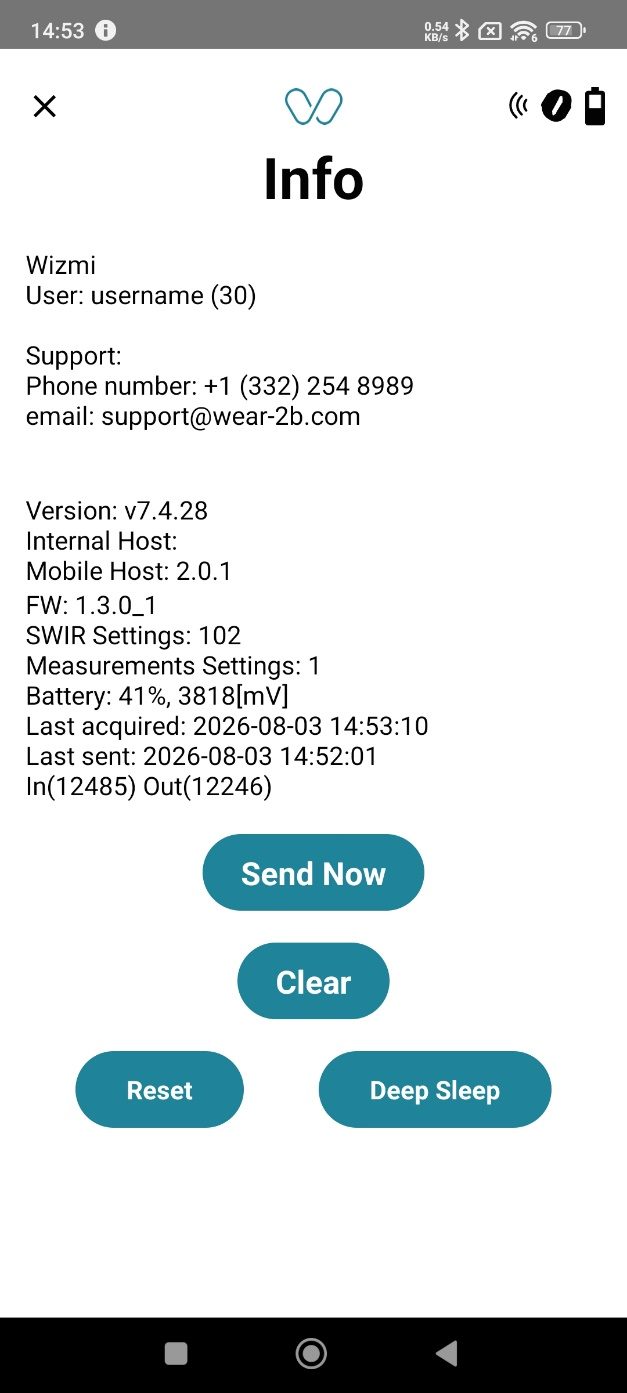
Tap the Main Menu (the three lines in the top-left corner of the screen), then tap Info.
On the Info screen, you can check the device's FW version and configuration, the battery level and the data transmission status. At the bottom of this page, you have control buttons which shouldn't be used unless instructed to by the study team.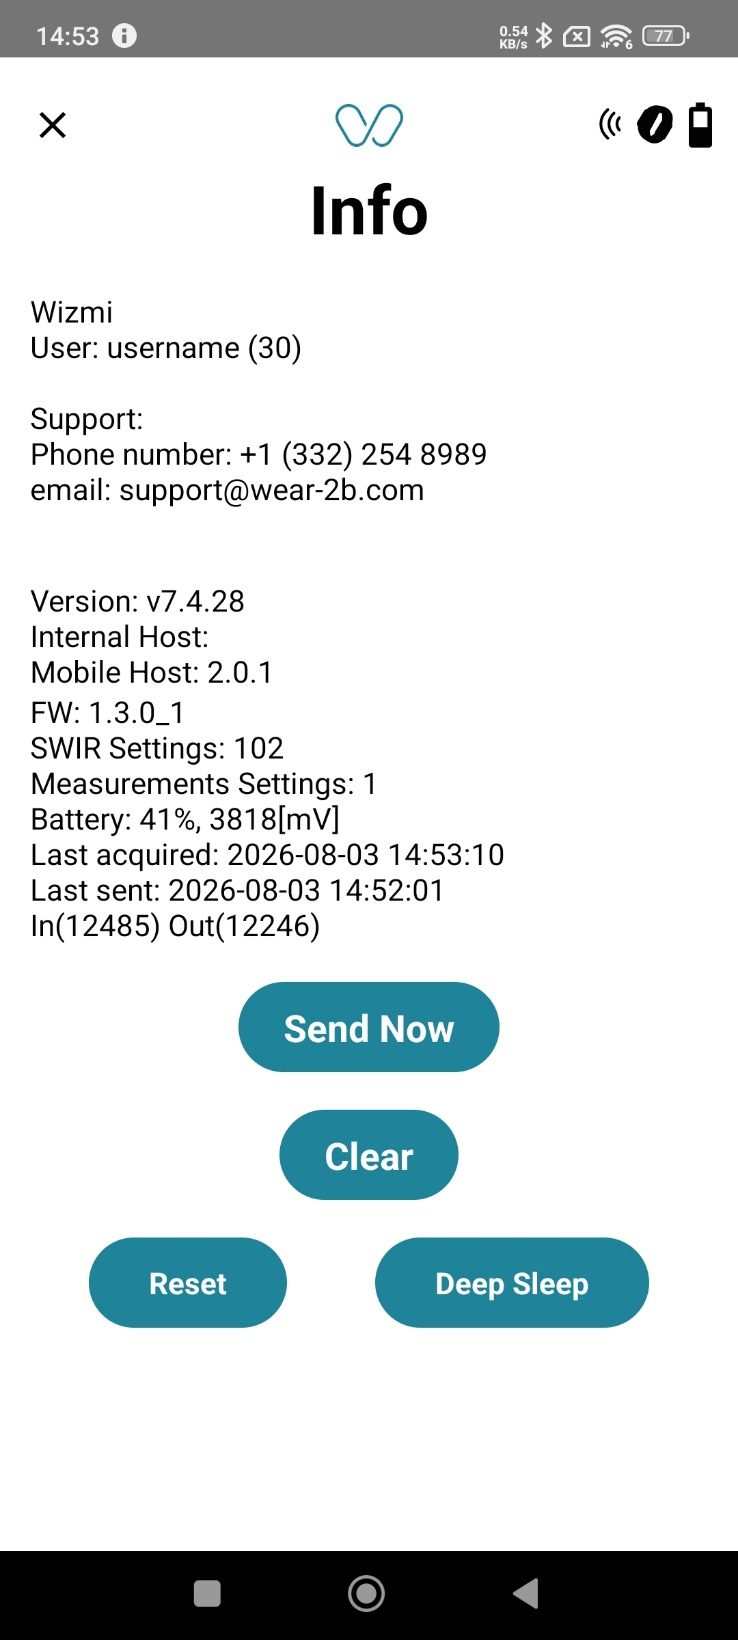
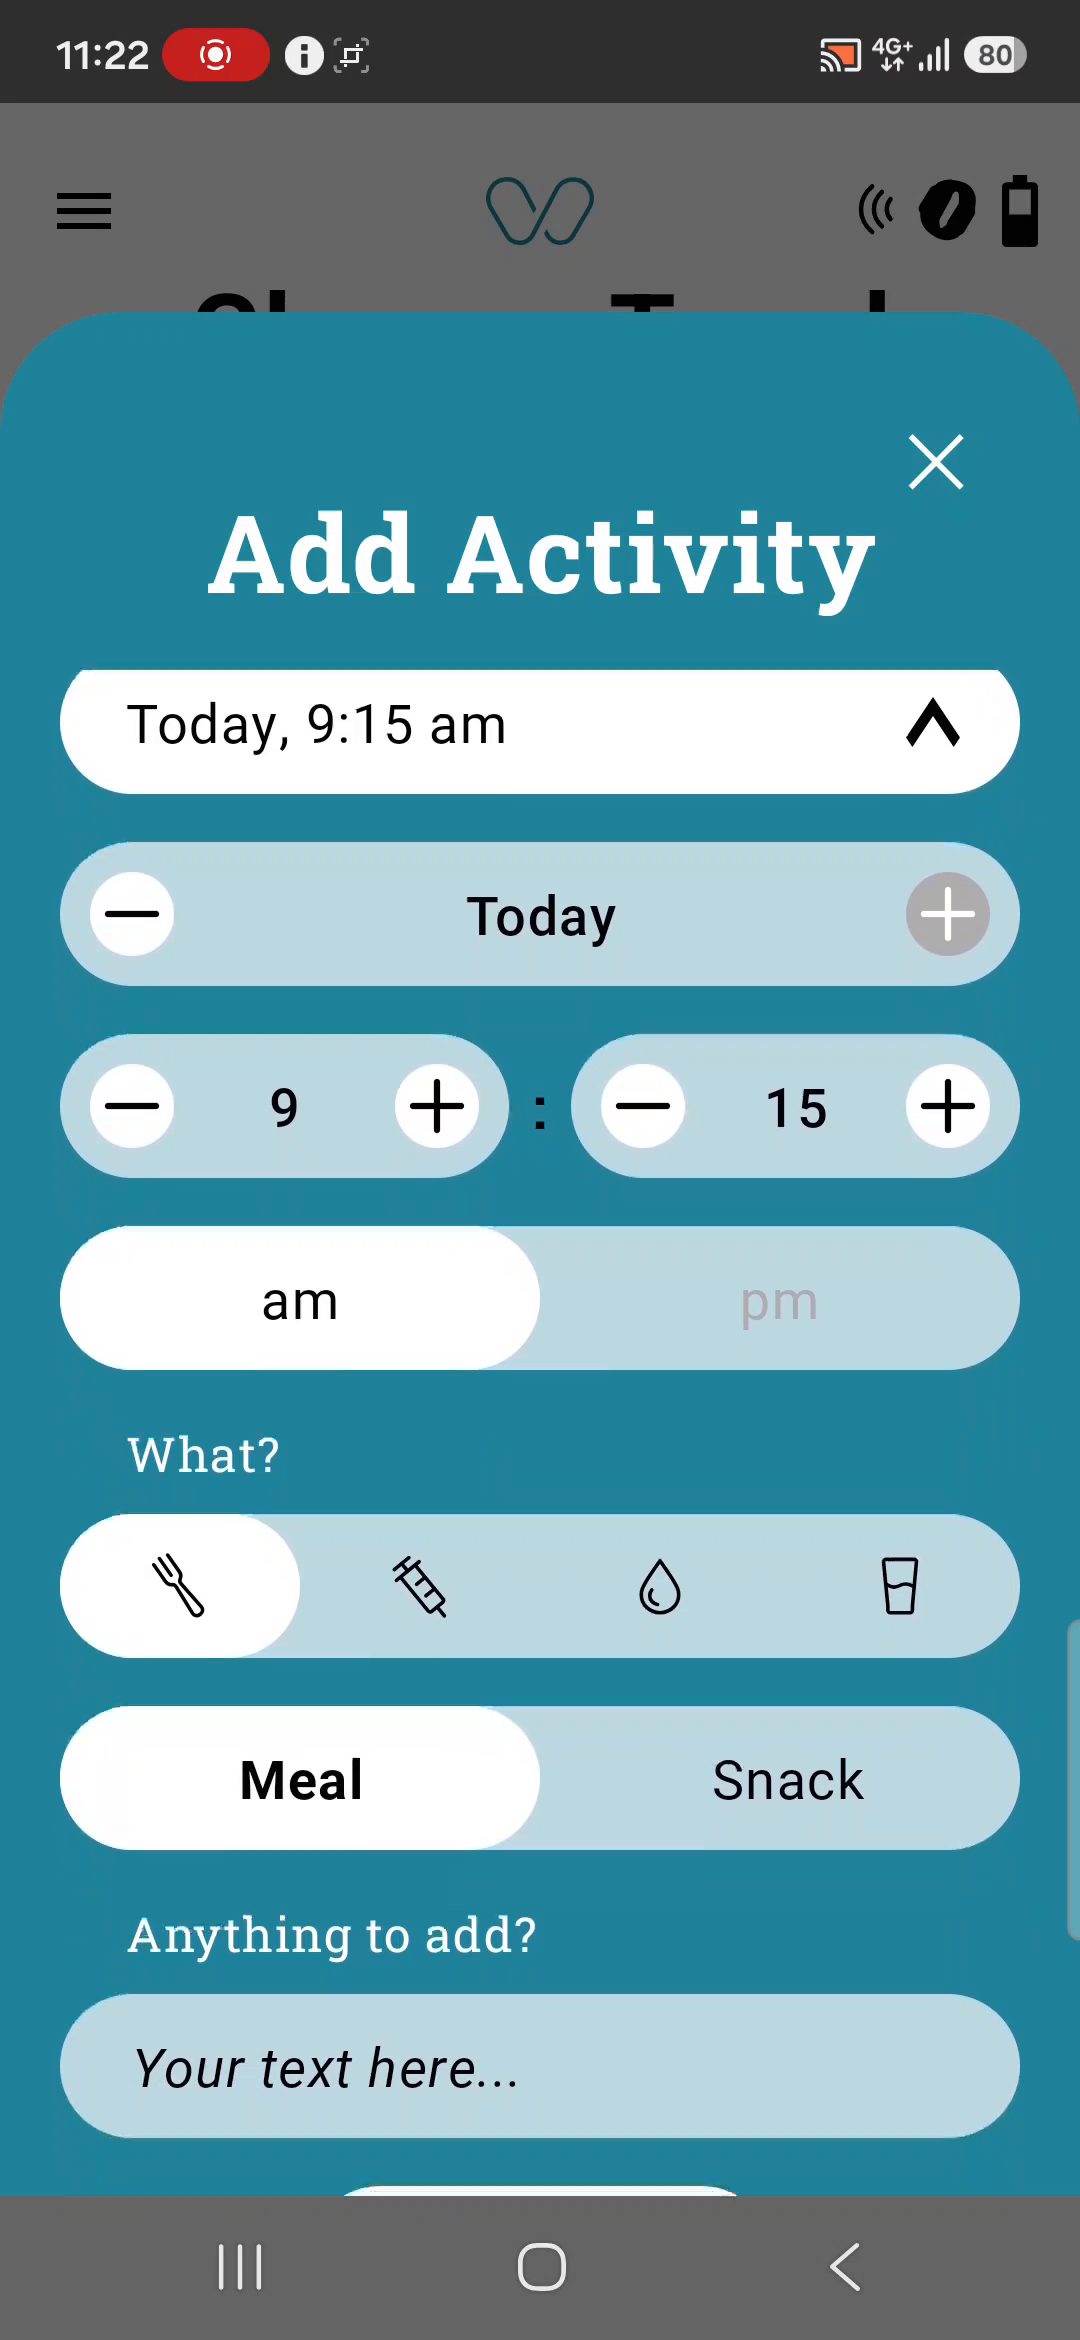
To add an activity, tap the Add activity button at the bottom of the main screen,
choose the activity you would like to document (eating/ drinking/ glucose measurement/Insulin injection)
fill in the details and tap Save
Before every wear
Study requirement:
You should wear the Wizmi device on your weaker (non‑dominant) hand for at least 20 hours each day, including at least 4 nights each week.
- Check your skin
Make sure the skin on your wrist is clean, dry, and not broken or irritated. - Check Bluetooth connection
Make sure Bluetooth is turned on in your smartphone settings. - Connect to the charger
Put your Wizmi device on the supplied charger and wait until you see the red/green light on the device. - Open the app
Open the Wizmi mobile app on your smartphone. - Check connection
In the Devices screen, confirm that the device status shows Connected. - Put on the device
- Place the device on the inside of your wrist (the inner, palm‑side of the wrist), 2 fingers distanced from the wrist joint.
- Wear it on the opposite side from where you would normally wear a watch, with the sensing surface in the middle of the inner wrist.
- Make sure that the Arrow with the FINGERS indication point towards your fingers.
- Adjust the strap
Tighten the strap so the device stays in contact with your skin without sliding, but not so tight that it hurts or cuts off circulation. - Check in the mobile App that Wizmi™ is connected and working
as expected.
Important:
Because glucose results are hidden (blinded) in this study, the main glucose screen in the Wizmi app will look blurred. This is normal and does not mean the device is broken.
Storage Instructions
- Store the device in a clean, dry place when you are not using it.
- keep the device in these conditions:
- Storage temperature: 41 °F to 95°F (+5°C to 35°C)
- Storage humidity: 20% to 80% (non-condensing)
- Do not expose or store Wizmi in water or very damp places, near direct heat, or in any other conditions that could damage the device, charger, or battery.
Troubleshooting
If the device looks damaged, feels very hot, looks swollen, or seems unsafe in any way, stop using it right away and contact the study support team.
| Problem | What you may see | What to do |
|---|---|---|
Device Disconnected | Wizmi is disconnected in the app:
|
|
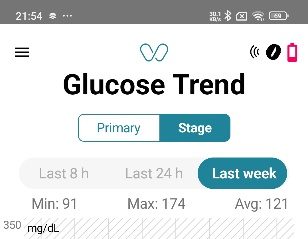
Battery low | Battery icon is red or very low
| Connect Wizmi to the charger until the battery shows it is charged. |
Data not uploaded | The counters date and time are not recent:
Timestamps are not updated |
|
App closed | No synchronization | Reopen the Wizmi application |
CGM failure | CGM error or warning message | Call your study team right away and follow their instructions. |